Course contents
From a view to a shortlist
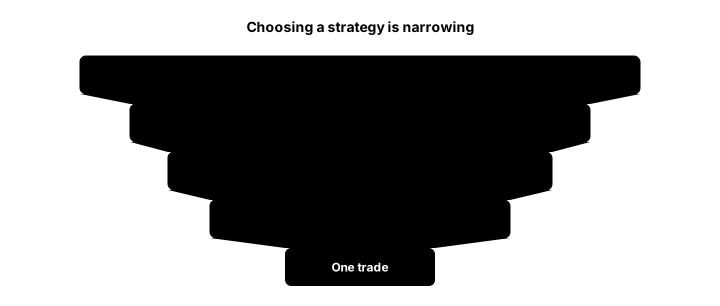
With so many structures available, the skill is narrowing. Start from the grid, add your volatility view, then filter by the risk you can accept, the capital and margin you have, and the liquidity of the strikes. What remains is your shortlist.
- Walk from a stated market view to a short list of candidate strategies using the direction-by-volatility grid
- Weigh defined against undefined risk and the margin each needs
- Use the strategy builder to compare two or three candidates before choosing
You now know thirty-eight strategies. That is not obviously progress, because a beginner staring at thirty-eight choices is often more stuck than one who knows three. The strategies were never the hard part. Choosing among them is. This chapter gives you a way to narrow the whole catalogue down to one trade, and the method is nothing new: it is the grid from the start of the course, followed by a few honest filters.
Start where the course started
Every choice begins with the two questions from Chapter 2. Which way do you think the underlying goes: up, down, or nowhere in particular? And how much do you think it moves: a big swing, or a quiet drift? Answer those two, and you have already crossed off most of the catalogue, because each region of the grid points to a small family of strategies.
Here is the grid turned into a lookup. Find your row, and you have a shortlist.
| Your view | Expected move | Defined-risk candidates |
|---|---|---|
| Bullish | A real move up | Bull call spread, or a long call; a call ratio back spread for a sharp breakout |
| Bullish | A slow grind or calm | Bull put spread; a cash-secured put if funded and willing to own |
| Bearish | A real move down | Bear put spread, or a long put; a put ratio back spread for a sharp breakdown |
| Bearish | A slow slide or calm | Bear call spread |
| Neutral | Stays in a range, calm | Short iron condor or iron butterfly (the defined-risk way to sell a range) |
| Neutral | A big move, direction unknown | Long straddle or strangle; long iron condor for a capped cost |
| Neutral | A moderate move either way | Double plateau |
| A precise target | Lands at or near a price | Bull or bear butterfly |
| A precise target | Lands in a band | Bull or bear condor |
Notice the column heading: defined-risk candidates. The undefined-risk versions exist for each row, the naked short straddle behind the iron condor, the naked call behind the bear call spread, but a beginner should stay in this column, and this chapter assumes you do.
The filter that breaks ties: volatility, cheap or dear
The grid usually leaves you with two or three candidates, and the cleanest tie-breaker is the one from Chapter 5's net-vega reading. Ask whether implied volatility is currently high or low. When implied volatility is high, options are expensive, so you want to be a net seller: favour the credit structures, the bull put spread, the bear call spread, the iron condor. When implied volatility is low, options are cheap, so you want to be a net buyer: favour the debit structures, the long call or put, the debit spreads, the long straddle. Being on the right side of volatility is often the difference between two trades that share the same direction.
The filters that decide if you can actually place it
Three practical filters then turn the shortlist into a single trade, and each is a callback to Part 1.
Risk you can accept. Can you name the maximum loss, and can you afford it? A defined-risk trade lets you answer yes to the first. Size the position so the second is yes too, meaning the max loss is a small fraction of your capital, not a wager that a single bad expiry could end.
Capital and margin. A sold, undefined leg ties up a large margin; a defined-risk spread ties up little, close to its capped loss. If two candidates express the same view and one is a spread, the spread usually wins on capital alone, before you even count the safety.
Liquidity. Only strikes with real volume and open interest are tradeable at fair prices. A structure that needs an illiquid far strike is a worse choice than a slightly less perfect one built from liquid strikes, because you have to be able to enter and, more importantly, exit.
One more, quietly: count the legs. A four-leg butterfly pays four sets of costs on the way in and out, so a thin edge can vanish into friction, as Chapter 6 warned. Simpler is often better, not because complex is clever, but because complex is expensive.
Build the finalists before you commit
When two candidates survive, do not choose from memory. Build each in Niota's strategy builder and compare them on the four numbers: max profit, max loss, breakeven, and net premium, plus the margin each demands. Seeing the two payoffs side by side, with real premiums and your real lot size, turns an abstract preference into a concrete decision. The builder is where the whole course becomes a single click of comparison.
What to carry forward
Knowing many strategies is only useful with a method for choosing one. The method is the grid first, direction and volatility, to get a shortlist; then whether implied volatility is cheap or dear to choose buying or selling; then the filters of nameable risk, affordable size, available margin, and real liquidity to reach a single trade; and finally the strategy builder to compare the finalists on their four numbers. The honest default, most of the time, is the simplest defined-risk structure that fits your view. The next chapter takes over from the moment after you enter, because choosing well is only half the job; the other half is knowing when and how to get out.